Showing posts with label Reviews. Show all posts

Friday, 20 March 2015

Da Vinci Brushes Review

Da Vinci are a German company providing high quality Kolinsky Sable brushes for artists. They have produced a range aimed at miniature painters.
I took delivery of these brushes a few weeks ago and as I have documented my life has been very busy. However I have been using these since the beginning of February and feel I am now in a position to offer a valid review having given them a thorough testing.

As you can see below, they arrived nicely packaged.

What hit me first is how thin the brush heads were. I am used to W&N Series 7 which have a thick head, but that was not the case here.
To start with, the brushes are made from pure Kolinsky Red Sable hair from selected male winter tails. The wooden handles are nicely shaped, not overly long or too short and sit comfortably in the hand. 
My initial thoughts were, wow, excellent for spot detail like eyes but will the brush have the strength for things like glazing were the side of the brush is used more.


So to the brushes themselves. I think this picture gives you an idea of how thin they are. The point is so tight you could almost stab yourself with it.
From left to right the sizes are
10/0 - brilliant for detail, fine lines and pupils
0 - Workhorse brush, slightly larger areas
0 Short - Stippling
00 - Detail brush
1- Work horse and brilliant all rounder

As you can see there are two I regard as work horse brushes. To be honest there is very little difference between them and if budget was an issue I would opt for Size 1


I took this as a comparison to W&N Series 7 Size 0 which is the one on the right. On the left is the Da Vince Size 1
The difference is clear.


So how did these brushes fair up under usage.
Now bear with me here while I explain some of my techniques. 
I like to apply glazes, something I am using more and more, gone are the days of using washes to fill in colour, I glaze, glaze and glaze. This involves tiny quantities of paint on the brush and slow building up the layers and the contrast.
With that in mind, here is the first advantage I found over the famous W&N Series 7
To glaze you need very little paint on the brush and I tended to struggle with Series 7. I cannot say that I have the same issue here. You cannot have loads of paint on the brushes anyway, they do not have enough sable but I have found my glazing work is progressing since using these brushes.
My second thing is the strength of the brush, does it hold up to using the side of the brush ?
In a nutshell yes it does. They work wonderful, not quiet the strength of Series 7 but certainly more than good enough for the task in hand.
Lets face it, a brush should only kiss the surface of the figure, so you should never use pressure.

Several weeks later and how are they holding up.
Very nicely if I sat so myself. I always was my brush at the end of a session and roll the tip in some brush soap to hold the tip in place.
I can honestly say I have not had an issue.

Time will tell if they have the longevity of Series 7 but these brushes are a serious contender to their crown and deserve a chance. I have given them some use, particularly the work horse brushes and both and standing strong.

Wednesday, 18 February 2015

Army Painter Part 2 - Paints and Starter Set


For the second part of the review I will be looking at the starter paint set.
The set itself comprises of 8 paints in the Vallejo style dropper bottles, which I find the best shape as you can more accurately control how much paint you use.
There is also a bottle of Quickshade Ink and as you would expect a brush to get you started.

You will find a guide inside the box which is an ideal component for anybody starting out. It provides a details on the different products and examples of how to use things, like the Quickshade.
The are paint charts to cover shading and highlighting al in a glossy brochure style information booklet.

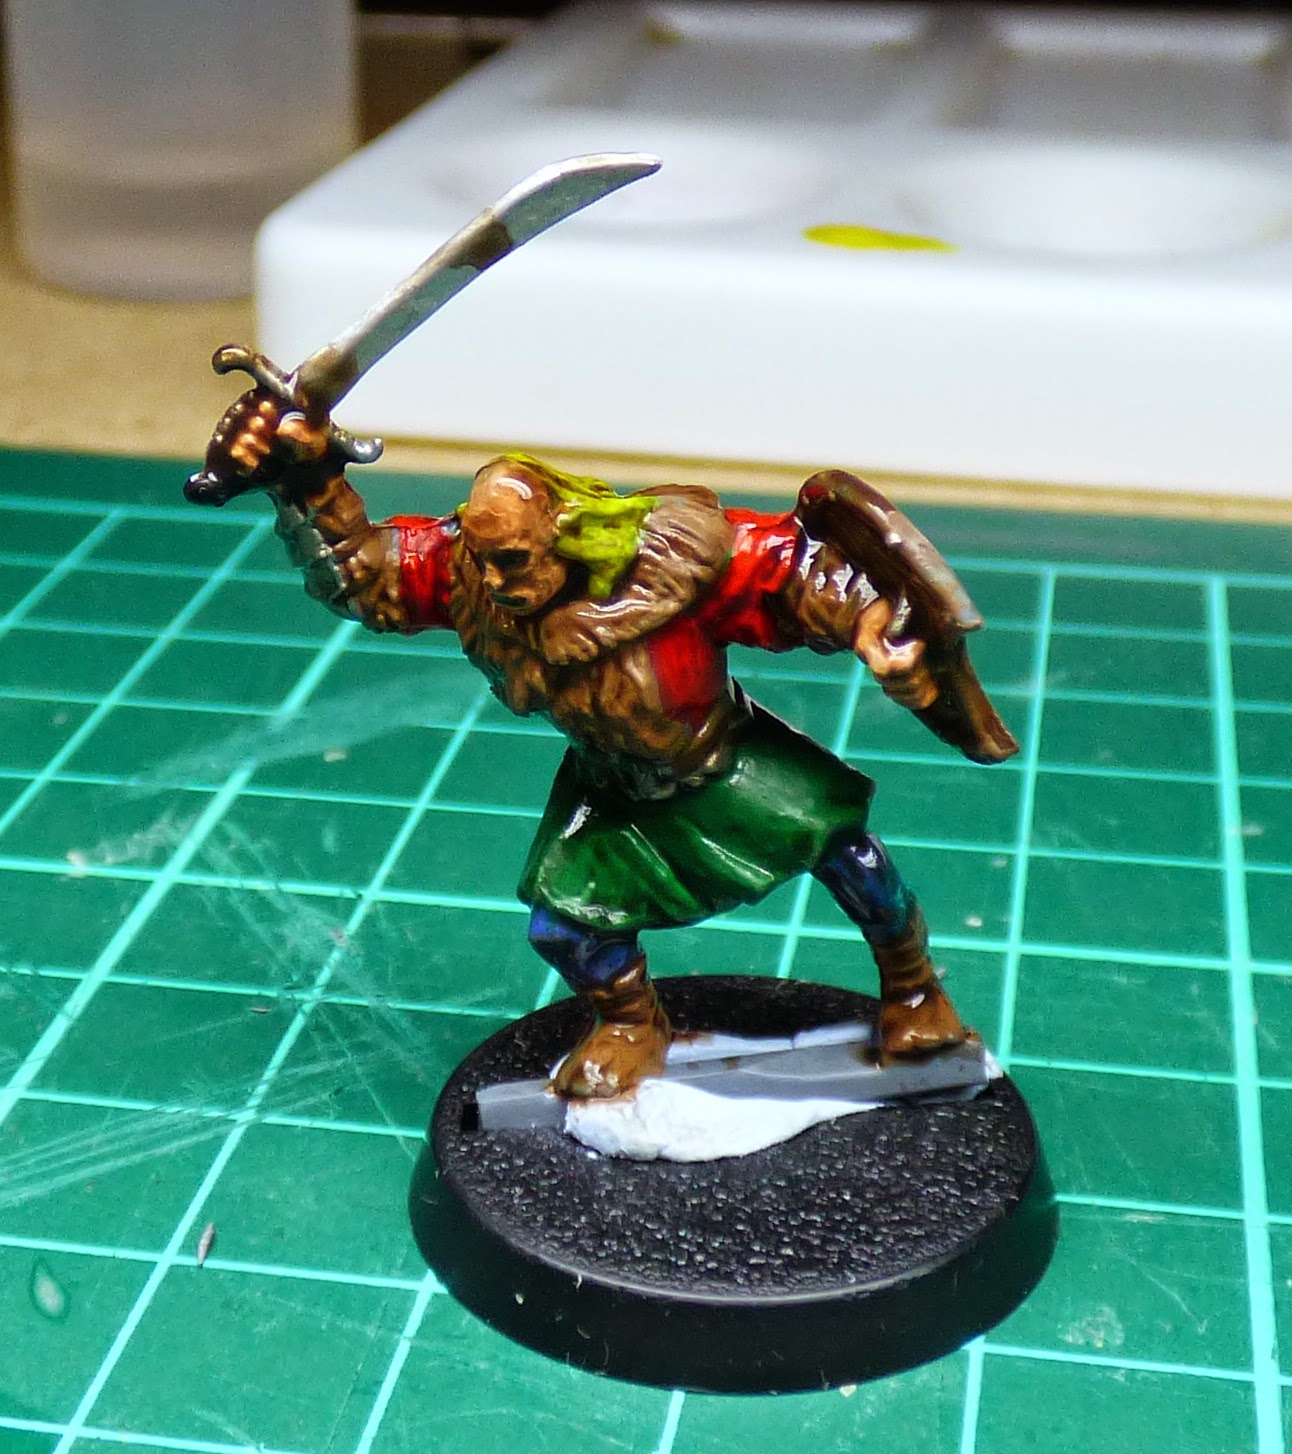
For the purpose of testing I have solely used everything the set provides, including the brush and although the below colour scheme is unusual, it does allow me to test all the items on one figure.
I have covered each section in the colours without any mixing, shading or highlighting to assess how the coverage is. Each of the paints were thinned to 50/50 water and paint, with three layers making the coverage.
So the coverage, spot on.The paints were a wonderful consistency after a good shake of the bottle. The only trouble I had was with the yellow, it took a lot of shaking to mix up, something I have discovered on a few other brands like Vallejo.
The colours have plenty of pigment, like GW paints and as you can see I have a very solid colour. 
Then there is the red, Pure Red, wow, what a vibrant shade of red it is. Without doubt this is the most vibrant red I have ever used.
The green is also quiet a unique shade of green, Greenskin, another plus point.
I have had many discussions around Army Painter metallics and how good they are so I was interested and eager to try.
Here you see I used Plate Mail Metal. Even with thinning there was no separation of pigment that can create that unwanted look of individual shiny parts of the pigment spoiling a pure finish. This finish was pure and even as you can see on the sword.
The brush was ideal for a starter and has a surprisingly good tip, if you look closely I comfortably managed pupils and outlines for the eyes.

Have basecoated everything I tried out the Quickshade Ink.
I gave the whole figure a good coating and left it to dry.

This dried as quick as a wash. I have reworked the sword slightly to remove that blotch spot of ink on the above photo.
The Quickshade has once again brought out the detail, but with one other advantage to the dipping variation of the Quickshade, it dries matt. It will also mix with any of the other paints.

I have two packs of grass tufts to use and these will be tried out on some of the figures I am working on. The swamp tufts are similar to other companies but the Tundra Tufts are unique to me as I have not seen other like this. No doubt I may be corrected on this.

In review I would state that the set is well thought out and provides the equipment and detail that any starter would be delighted with the result that can be achieved.
Astor the paints then I thin these are good enough to be used at any level. I will definately be using these on a regular basis. The high pigment count make these an ideal choice for a vibrant finish.

Monday, 16 February 2015

Army Painter Review Part 1 - Quickshade and Sprays


Based in Denmark the company is ran by Jonas Faering and Bo M. Penstoft. Both are highly experienced in the gaming world having worked for many years for Games Workshop. Their site explains that they wanted to create a quick way of painting armies so they could spend more time gaming. From this idea the creations they have come up with some fascinating products that I feel can have various applications for the speed and display painters.
The first thing we will concentrate on is their range of primers. Each come in a spray can as you see below and I have been testing the colours Skeleton Bone, Leather Brown and Platemail Metal.
These sprays have been matched to their paint pots, ideal for any touch ups you need.

For the purpose of testing I have covered a figure completely with one colour.
So for the coverage ? Can't be faulted to be honest. Covers very well and even if you get a little thick in places the paint dries very even with little or any loss or detail as you can see below.

Now for the next part of the process and this is where Army Painter has taken a different line to other companies, The Quickshade.
A simple pot of wash designed to cover your figure and create shading without the need for lengthy painting, glazing, thin washes etc etc.
The Quickshade is also a varnish so it will shade and protect your model in one go, bonus.
I am using the Strongtone, followed by an application of Matt Varnish.
To use couldn't be easier - shake the can, dip the figure in, shake off the excess and allow to dry for 24 hours. Simple.
As you can see below, the shading has been instantly brought out, you have definition but you also have a glossy finish. That isn't a problem if you want that, but there is some detail that is lost by the finish and this detail needs re-discovering.
I now applied about 4-5 thin layers of Matt Varnish, allowing a few minutes between each coat and the difference was very noticeable. The gloss went and a perfect Matt finish was created. I also noticed that some of the definition came back and the figure looked so much better.

One Word of Warning !!!
Follow the instructions for the Matt Varnish and learn from my mistake. You find the instructions on the side of the can.
I tend to use a brush on varnish so the spray was relatively new to me, so I liberally applied a coating only to find the smooth paint that was there had gone deformed. Some sort of reaction had seemed to take place as you can see below on the thigh area.

I contacted Jonas at Army Painter for his advice and it was simply down to user error. Applying too much varnish in one go can cause wrinkling. This can be all spray varnishes and not just Army Painter.

My thoughts on the Quickshade and varnish are very positive. The dipping system is something many can use to create instant shading and the Matt Varnish is frankly excellent. There is not the slightest colour deterioration that I could notice.
As someone who paints for display purposes I will find uses for the primer and the Quickshade. 
All figures benefit from setting a base tone, for example, when painting Mordor Orcs I tend to base everything with a dark brown and paint up the colours from there.
When using the Quickshade I would be applying further paint to set my own highlighting and working the blend.
In all excellent and well thought out products that have found a niche in the market and long may that continue.
I hope you find this review useful.


Monday, 29 December 2014

Review - Scale 75 Unnatural Flesh

Scale 75 are a Spanish Company, producing high quality paints that you can buy in sets or the full range in a mega set deal.
Below is the second set I have bought, after the black and white paint set which left me so impressed I had to buy more of them.
So here is the Unnatural Flesh set which I bought for my EFGT Goblins.
You get a range of 8 paints that have been carefully created to match the required palette. Each bottom is the traditional dropper dispenser that fellow country product Vallejo use.
The first thing to note is the dropper is sealed, you need either a needle or in my case, the end of a small round file to puncture the seal.
I noted that the paints were separated from the water and here was the first notable difference to Vallejo. The paints mixed after a 5 second shake, not the 30 seconds required with Vallejo.
On dispensing the paint I noted it was perfectly consistent throughout.
 These colours at first glance may seem extreme but I found them to be perfect for the job in hand. The colours are also somewhat unique which is another advantage in creating a unique look.
All going well so far and then there is another thing in the packaging.
 A painting guide !
What you see above is two clear articles to use the paints to create different looks, each article in four languages and are accompanied by a series of photos to hel[ you along the way.
 So now to the painting. The paints look so enticing you could be tempted to use them neat. I managed to avoid that and thinned them to roughly one part paint one part water. Application was perfect, two coats doing the trick to leave a consistent base coat to work from. The system here is to set a good mid / highlight tome all over then add the shading.
 Now the first areas of shading are applied using some fantastically named pots. This first shade is Undead Flesh.
Now some Hellbound Flesh mixed with Misfits Green
 And so on through the shades before adding a couple of layers of highlight at the extremeties.

 I should also add that these paints mix perfectly with each other allowing you to create your own 
schemes.
 And finally
 Here is the finished piece completed in a couple of solid hours painting. I did the scheme as a test to see what I thought and I am delighted with the look. The photos make this figure look slightly bluer than reality. My achilles heel is photography but I will improve (He says hopefully)
So the final thought. Excellent paints, in fact I find these the best I have and have to stop myself getting the rest of them. 
I have ordered their pigments and shall conduct a review of those once I have tried them.